

There is a particular smell that tells you autumn has actually arrived in my kitchen, and it is not the candle I light in October or the first chilly morning that makes me reach for a sweater. It is apples, butter, and cinnamon hitting hot air. The moment this easy cinnamon apple crisp goes into the oven, the whole house starts to smell like a bakery that only makes one thing, and makes it well. I have baked this dessert on rushed weeknights when friends texted that they were on their way, on slow Sundays when the rain kept us inside, and once, memorably, at nearly midnight because I had bought a bag of apples that was going soft faster than I expected. Every single time, it worked.
What I love most about this recipe is how forgiving it is. You do not need a pie crust, a rolling pin, or any special equipment beyond a bowl, a baking dish, and a fork. The apples soften into a jammy, spiced filling while the oat topping turns golden and craggy on top, and the contrast between the two is exactly what makes a crisp so satisfying. A spoonful straight from the dish, still warm enough that the juices bubble at the edges, is one of the simplest pleasures in home baking. If you have ever felt nervous about baking fruit desserts, this is the place to start, because there is almost nothing here that can go badly wrong.
This version keeps things deliberately simple. Six apples, a handful of pantry staples, and about twenty minutes of hands-on work stand between you and dessert. The filling is sweet but not cloying, thanks to a squeeze of lemon and a mix of tart and sweet apples, and the topping has real crunch because the butter stays cold until it meets the oats. Serve it warm, preferably with something cold and creamy on top, and watch how quickly the dish empties. Here at SavorFoodies, this is the kind of recipe I come back to again and again, not because it is fancy, but because it never lets me down.
Why This Recipe Works
The first reason this easy cinnamon apple crisp works so well is the apple mix. One variety alone can leave you with a filling that is either too sharp or too sweet, and sometimes too mushy after baking. I use half Granny Smith and half Honeycrisp, and that pairing gives you the best of both worlds. The Granny Smiths hold their shape and bring a bright tartness that cuts through the sugar, while the Honeycrisps soften a little more and add natural sweetness and juice. If your grocery store does not have Honeycrisp, Gala or Braeburn make a fine substitute, and a single-variety batch still tastes wonderful, just a touch less layered.
The second reason is the topping ratio, which I tested more times than I care to admit. Too much flour and the topping bakes up pale and pasty. Too much butter and it melts into a greasy sheet instead of staying crumbly. This recipe uses equal parts oats and flour by volume, plenty of brown sugar for caramel notes, and cold butter cut in just until the mixture holds together in uneven clumps. Those clumps are the whole point. Leave them lumpy. When they bake, the bigger pieces turn deeply golden and crisp while the smaller bits toast around them, so every spoonful has texture. Quick oats will work in a pinch, but old-fashioned rolled oats give a noticeably heartier crunch, and that is what I reach for every time.
The third reason is patience at the end, which sounds small and matters more than anything else in the method. A crisp that comes straight from the oven looks tempting, but the filling is still thin and runny at that moment. Ten to fifteen minutes of resting lets the juices thicken into a syrup that coats the apples instead of pooling on the plate. The topping stays crisp during that rest because it is sitting on top of the fruit, not drowned in it. I know waiting is the hardest part when the kitchen smells this good. Set the dish on a wire rack, put the kettle on, get the bowls out, and by the time you have done all that, it will be ready.
There is also a bit of history worth knowing. Apple crisp became popular in America in the early twentieth century, partly because it delivered all the comfort of apple pie without the fuss of pastry. That practical spirit is still the recipe’s greatest strength. It was designed for home cooks using everyday ingredients, and it still rewards that approach today. You can find plenty of elaborate desserts in our desserts and baking collection, but few of them are as quick, as reliable, or as universally loved as this one.
Ingredients You Need
Before you start, read through the list once and set everything on the counter. Baking goes much more smoothly when you are not hunting for the cinnamon with sticky hands. You will need two bowls, one large for the apples and one medium for the topping, plus a 9 by 9 inch baking dish or a similar 2-quart dish. A pastry cutter helps with the topping, but two forks or your fingertips do the job just as well.
For the apple filling:
- 6 medium apples, about 3 pounds, half Granny Smith and half Honeycrisp, peeled, cored, and sliced about one-quarter inch thick
- 1 tablespoon fresh lemon juice
- 1/3 cup granulated sugar
- 2 tablespoons all-purpose flour
- 1 1/2 teaspoons ground cinnamon
- 1/4 teaspoon ground nutmeg
- 1/4 teaspoon fine salt
- 1 teaspoon vanilla extract
For the oat topping:
- 1 cup old-fashioned rolled oats
- 3/4 cup all-purpose flour
- 3/4 cup packed light brown sugar
- 1 teaspoon ground cinnamon
- 1/4 teaspoon fine salt
- 1/2 cup cold unsalted butter, cut into small cubes
A few notes on these ingredients will save you trouble. Peel the apples if you want a smooth, tender filling, which is what most people prefer in a crisp. Leaving the peels on adds a little color and fiber, but the peels can turn papery after baking, so I peel them for guests and keep them on only when I am baking just for myself. Slice the apples evenly, because thick and thin slices in the same dish cook at different rates, and you will end up with some pieces mushy while others are still firm. A quarter inch is the sweet spot: thin enough to soften fully in forty minutes, thick enough to keep some bite.
On the spice front, cinnamon does the heavy lifting here, and it deserves a fresh jar. Ground cinnamon loses its punch after a year or so sitting above the stove, so if yours smells faint when you open it, buy a new one before baking. Cinnamon brings warmth and sweetness without adding sugar, which is why the filling tastes so full even though the sugar amount is modest. The pinch of nutmeg is optional in the strictest sense, but it deepens the flavor in a way people notice without quite being able to name. Vanilla goes in last, stirred through the apples so its fragrance survives the oven rather than baking off.
The butter question comes up a lot, so let me settle it. Cold butter, cut into cubes and worked in briefly, gives a crisp, distinct topping. Melted butter is easier to stir in, and many recipes use it, but the result is denser and more cookie-like, with less of that craggy crunch. If you only have salted butter, use it and skip the added salt in the topping. If you want to add nuts, half a cup of chopped pecans or walnuts stirred into the topping adds a lovely toasted note, but the recipe is complete without them, and I often leave them out so the oat flavor shines.
How to Make It
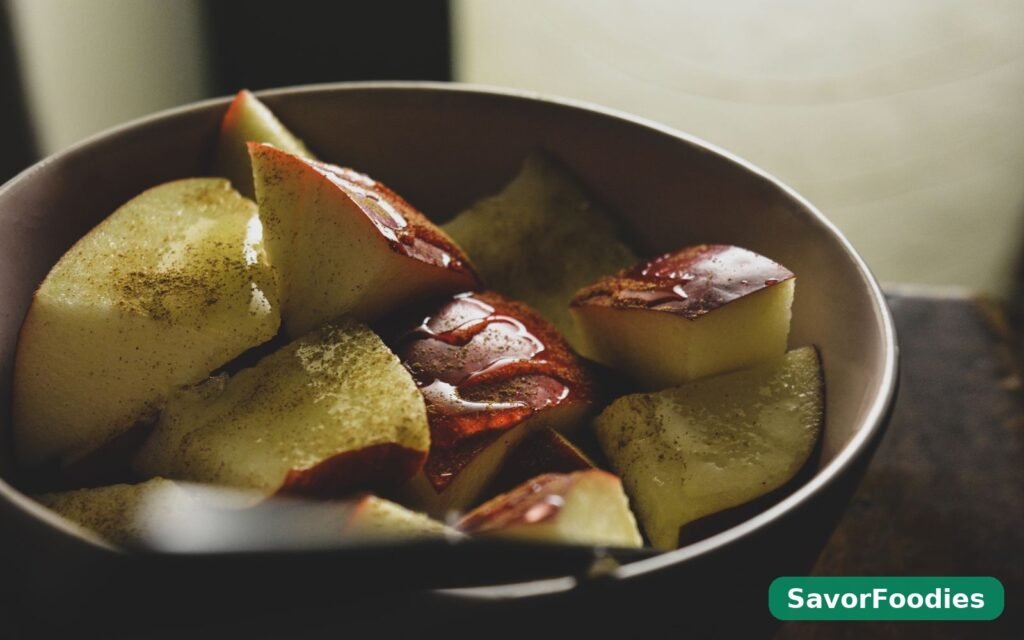
- Heat the oven and prepare the dish. Set the oven to 350 degrees Fahrenheit and move a rack to the center position. Lightly butter a 9 by 9 inch baking dish, getting into the corners so the filling does not stick. If you are using a glass dish, that is fine, though it may need an extra few minutes in the oven compared with metal, so watch the topping color rather than the clock alone.
- Toss the apples. Put the sliced apples in a large bowl and sprinkle the lemon juice over them right away, tossing gently so every slice gets a little coating. The lemon keeps the apples from browning while you work, and it brightens the finished filling. Add the granulated sugar, flour, cinnamon, nutmeg, salt, and vanilla, then toss again with a large spoon or your hands until the slices look evenly dusted and slightly glossy. There should be no dry pockets of flour sitting at the bottom of the bowl.
- Fill the dish. Tip the apple mixture into the buttered dish and spread it into an even layer, pressing down lightly so there are no big air gaps. The apples will sink as they bake, so a full-looking dish at this stage is normal and good. Scrape any sugary juices from the bowl over the top, because those juices turn into the syrup that makes the filling taste caramelized rather than simply sweet.
- Make the oat topping. In a medium bowl, stir together the oats, flour, brown sugar, cinnamon, and salt until combined. Scatter the cold butter cubes over the top, then cut the butter in with a pastry cutter, two forks, or your fingertips. Work quickly and stop when the mixture looks like coarse, uneven crumbs with some pea-sized lumps still visible. If the butter starts to feel warm and greasy, pop the bowl in the fridge for five minutes before continuing. You want distinct pieces of butter coated in the dry mix, not a smooth dough.
- Top and bake. Sprinkle the topping evenly over the apples, covering them right to the edges of the dish. Bare patches of apple will dry out and darken, while a full blanket of topping bakes into an even golden crust. Place the dish on a rimmed baking sheet to catch any juices that bubble over, then slide it into the oven. Bake for 40 to 45 minutes. You are looking for a topping that is deep golden brown, not pale blonde, and filling that bubbles thickly around the edges. If the topping browns before the apples are tender, lay a loose sheet of foil over the dish for the last ten minutes.
- Rest before serving. Take the crisp out of the oven and set it on a wire rack. It will be bubbling hard and the smell will be almost unfair. Let it rest for 10 to 15 minutes. During this time the juices thicken, the topping firms up, and the filling cools to a temperature you can actually enjoy rather than one that burns your tongue. Spoon it into bowls while it is still warm, making sure each serving gets both soft apples and plenty of crunchy topping.
Tips for the Best Crisp Topping
The topping is where most crisps succeed or fail, and a few small habits make all the difference. First, keep everything cold. Cold butter, a cool bowl, and quick hands give you distinct crumbs. If your kitchen is warm, chill the butter cubes for ten minutes before you start, and do not overwork the mixture trying to make it look neat. Ugly, lumpy topping bakes into the prettiest crisp, because those irregular pieces catch the heat and toast at different rates, giving you crunch in every bite.
Second, do not skimp on the topping layer. It can be tempting to spread it thinly to make it stretch, but a thin layer dries out and disappears into the filling. This recipe makes enough to cover a 9 by 9 dish generously, and that full coverage is what keeps the apples moist underneath while the top stays crisp. Press the topping down very lightly, just enough that it sits in place, and leave the surface rough rather than smoothing it flat. Those little peaks brown first and taste the best.
Third, watch the oven, not just the timer. Ovens run hot or cool by twenty degrees or more, and a crisp that is perfect at forty minutes in one oven may need forty-eight in another. Start checking at thirty-five minutes. Look through the oven window for color: you want a rich, even gold across the top, with the edges a shade darker. Listen, too, if your kitchen is quiet enough. A finished crisp makes a faint bubbling sound as the fruit syrup boils at the edges, and that sound is a better sign of doneness than any number on a dial.
Fourth, think about the dish you bake in. A shallow, wide dish gives more topping per bite and a crisper result, because more of the surface is exposed to the heat. A deep, narrow dish gives a juicier, softer result, because the filling steams under a thicker layer. Both are good, but they are different desserts, so choose based on what you like. For this recipe, a 9 by 9 inch dish or a 10 inch round pie plate hits the balance I prefer, with enough depth for tender apples and enough surface for a proper crust.
Finally, if you love extra crunch, there are two easy upgrades that do not change the recipe’s character. Stirring half a cup of chopped pecans into the topping adds toastiness, and swapping two tablespoons of the flour for finely ground almonds gives a slightly nutty, bakery-like depth. A light sprinkle of coarse sugar over the topping just before baking adds sparkle and an extra crackle. None of these are necessary, and I would rather you bake the plain version first, taste it, and then decide what, if anything, you want to change next time.
What to Serve With It
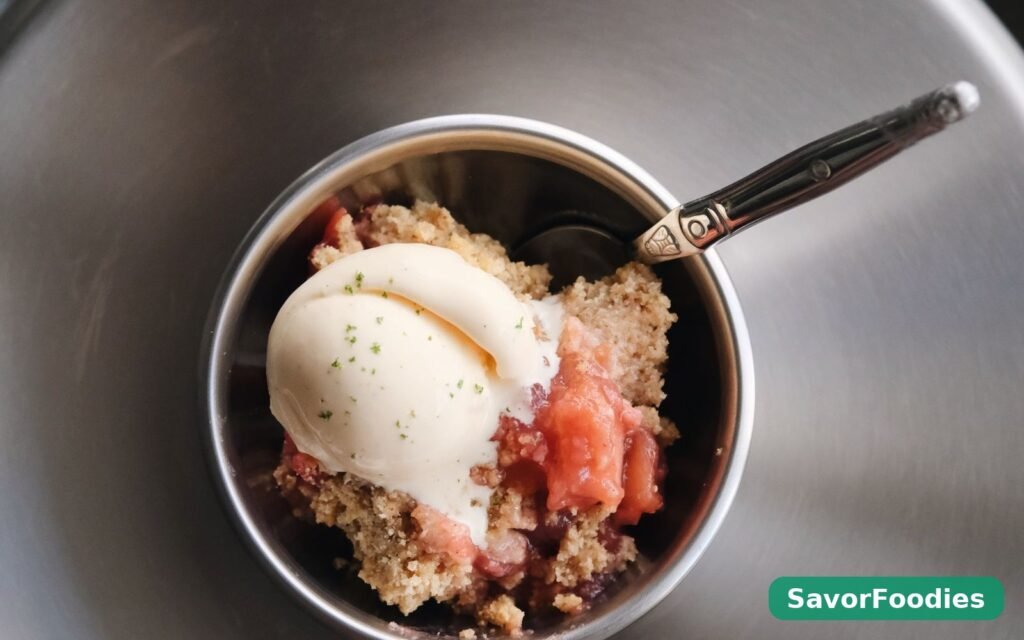
Vanilla ice cream is the classic partner for warm apple crisp, and it earns that title honestly. The cold cream melts into the hot, spiced apples, and the contrast of temperatures is half the pleasure. Use a good vanilla ice cream if you can, one where you can see the vanilla flecks, and let it soften on the counter for five minutes so it scoops easily and melts slowly rather than sitting in a cold lump. One generous scoop per bowl is plenty, because the crisp itself is rich.
If ice cream is not your thing, lightly sweetened whipped cream is a beautiful alternative, especially if you whip it yourself with a splash of vanilla and just a teaspoon of sugar. It is lighter than ice cream, so the apple flavor stays front and center. For a brunch table or a cooler evening, a dollop of thick Greek yogurt with a drizzle of honey works surprisingly well, adding tang that balances the sweetness. Warm custard is another wonderful choice, poured over the crisp at the table so each person can decide how much they want.
For drinks, keep it simple. A mug of black coffee or tea cuts through the richness, and a glass of cold milk is, for many of us, the nostalgic choice that takes the dessert straight back to childhood kitchens. If you are serving this after a bigger meal, small portions in little bowls feel generous without being heavy, and guests will almost always ask for a second small helping rather than regretting a large one.
When I am baking for a crowd, I often put out a second, smaller dessert alongside the crisp so people have a choice. A batch of small-batch cookies without baking soda is ideal for that, because it makes just enough for a few people and does not leave you with trays of leftovers. Cookies and crisp together cover both the warm, spoonable dessert lovers and the dunk-in-coffee crowd, and neither one demands much extra work.
Storage and Reheating
Leftover apple crisp keeps better than most people expect, provided you store it properly. Let the dish cool completely, then cover it tightly with foil or transfer the leftovers to an airtight container. It will keep in the fridge for up to four days. The topping will soften in the fridge, because the moisture from the apples works its way upward overnight, but that is fixable, and the flavor actually deepens by the second day as the spices settle into the fruit.
To reheat a single serving, the microwave is the fastest option. Thirty to forty-five seconds is usually enough, though the topping will stay soft. For the best texture, reheat in the oven. Place the crisp in an ovenproof dish, cover loosely with foil, and warm at 350 degrees for about fifteen minutes, then uncover for the last five minutes so the topping crisps up again. If you are reheating the whole dish from the fridge, give it twenty to twenty-five minutes and check that the center is hot before serving.
Freezing is possible, though the texture changes a little. Baked crisp, cooled completely and wrapped tightly, freezes for up to three months. Thaw it overnight in the fridge, then reheat in the oven as above. The apples will be softer after freezing, and the topping will never be quite as shattering as it was on day one, but it is still a very good dessert, especially with ice cream. For the best frozen result, some bakers freeze the unbaked crisp instead, assembling it in a freezer-safe dish and baking straight from frozen with about fifteen extra minutes added to the time. That method keeps the topping crisper, and it is worth trying if you like to keep a dessert ready in the freezer.
One more practical note: do not leave the crisp sitting out on the counter for more than two hours, especially on a warm day. Fruit desserts spoil faster than they look like they would, and the fridge is a much safer home for leftovers. Label the container with the date if your fridge, like mine, tends to collect mystery dishes at the back, and eat the oldest leftovers first.
Frequently Asked Questions
Can I make this apple crisp ahead of time?
Yes, and it is a genuinely good make-ahead dessert. You can assemble the whole dish up to a day in advance, cover it tightly, and keep it in the fridge unbaked. Bake it straight from the fridge, adding about five to ten minutes to the baking time, and checking that the filling bubbles at the edges before you take it out. You can also bake it fully, cool it, and refrigerate it, then reheat it in the oven as described above. I prefer the assemble-ahead method for guests, because the topping stays at its crispiest when it is baked fresh.
Do I have to peel the apples?
No, you do not have to, but I recommend it for the best texture. Peels soften in the oven but never fully disappear, and they can feel papery or tough in an otherwise tender filling. If you are short on time, leaving the peels on is a reasonable shortcut, and the crisp will still taste good. Choose thin-skinned varieties like Gala if you skip peeling, and slice the apples a little thinner so the peels have less presence in each bite.
What are the best apples for apple crisp?
A mix of tart and sweet apples gives the most interesting flavor. Granny Smith brings tartness and structure, Honeycrisp brings sweetness and juice, and Braeburn, Pink Lady, and Jonagold all sit nicely in between. Avoid very soft apples like Red Delicious or McIntosh on their own, because they can collapse into sauce during baking. If you only have one variety, use it anyway and adjust the sugar slightly: add a tablespoon more for very tart apples, or a tablespoon less for very sweet ones.
Can I reduce the sugar in this recipe?
You can, within reason. The filling sugar can drop to a quarter cup without harming the structure, though the apples will taste sharper and the syrup will be thinner. The topping sugar is harder to cut, because brown sugar is part of what makes the topping crisp and caramelized, not just sweet. If you cut the topping sugar by more than a couple of tablespoons, the topping turns pale and dry. A better approach for a lighter dessert is to serve smaller portions with unsweetened whipped cream or yogurt, rather than changing the recipe itself.
How do I keep the topping from getting soggy?
Three things matter most. First, keep the butter cold and the topping lumpy, as described above, because distinct crumbs stay crisp longer than a smooth paste. Second, do not cover the crisp while it is still hot, because trapped steam softens the topping within minutes. Let it cool uncovered on a rack. Third, reheat leftovers in the oven uncovered for the last few minutes, which drives off moisture and restores crunch. If you are storing leftovers, keep them in a container with a loose-fitting lid rather than sealed airtight while still warm, and only seal it fully once the crisp is cold.
Can I make this recipe gluten-free or dairy-free?
Yes, with simple swaps. For gluten-free, use a one-to-one gluten-free flour blend in both the filling and the topping, and check that your oats are certified gluten-free, since regular oats can carry traces of wheat from processing. For dairy-free, use cold coconut oil or a firm plant-based butter in place of the butter, and serve with coconut ice cream or oat-based whipped topping. The texture will be slightly different, a little less rich, but the apples and cinnamon still carry the dessert, and I have served both versions to guests who asked for seconds.
There is one more idea worth mentioning if you love small-batch baking. When the crisp feels like too much for a quiet evening, a tray of small-batch chocolate chip cookies without brown sugar gives you a warm, homemade treat in a much smaller quantity, and it uses pantry staples you probably already have. It is a good companion recipe to keep in mind for nights when you want something sweet without filling the whole kitchen with dessert.
This easy cinnamon apple crisp has become one of those recipes I make without looking at the card anymore, because the steps have settled into muscle memory: peel, slice, toss, crumble, bake, wait. That last step is still the hardest, but it is also the moment when the kitchen fills with the smell that makes everyone wander in to ask what is in the oven. Bake it for a family dinner, for friends who drop by unexpectedly, or just for yourself on an ordinary Tuesday that could use a little warmth. Then spoon it up while it is still warm, add something cold on top, and enjoy the quiet that follows the first bite, when everyone at the table is too busy eating to talk.