

There are some desserts that feel like cheating, in the best possible way. These bars are one of them. No oven, no mixer, no fiddly technique — just a buttery biscuit base pressed into a tin, a thick peanut butter filling, and a layer of chocolate poured over the top. An hour in the fridge, and you have something that tastes like it came from a bakery, cut into neat squares that disappear faster than any cake I have ever baked.
I first made these on a summer afternoon when turning the oven on felt like a punishment. A friend had mentioned a no-bake bar she made for a bake sale, and I was sceptical, because no-bake desserts have a reputation for tasting like a compromise. These did not. The base is properly buttery and crisp, the filling is salty and creamy in exactly the right proportion, and the chocolate top snaps when you bite it. They have been in regular rotation ever since, and they are the dessert I make when I need something reliable for a gathering and do not have time to babysit an oven.
The other reason I love them is that they are almost impossible to mess up. There is no rising, no baking time to judge, no risk of a sunken middle. If you can melt butter and stir, you can make these bars. And because they live in the fridge, they are ready whenever you need them — a square with coffee after dinner, a lunchbox treat, or a plate to take to a neighbour. Keep a batch in the fridge and you will understand why no-bake does not mean second-best.
Why This Recipe Works
A good no-bake bar works because of balance, and this one gets it right in three layers. The base is crushed biscuits and melted butter, pressed firmly into the tin so it holds together when sliced but still crumbles pleasantly when you bite it. The filling is peanut butter, butter, and icing sugar, beaten until smooth — sweet, but with enough salt to keep it from being cloying. And the top is real chocolate, melted with a little butter so it sets firm but not rock-hard, and slices cleanly instead of shattering.
The proportions matter more than the technique here. Too much icing sugar and the filling turns gritty and tooth-achingly sweet. Too little butter in the chocolate and the top cracks into shards when you cut it. The ratios in this recipe have been tested enough times that I can promise they work: a base that holds, a filling that is creamy rather than crumbly, and a top that snaps cleanly. It is a simple formula, but it is a formula that has been tuned, and that tuning is what separates a good bar from a mediocre one.
There is also the practical appeal. No oven means no heating up the kitchen, no preheating time, and no watching through the oven door. The whole active time is about twenty minutes, and the fridge does the rest. It is the same kind of low-effort baking logic that makes small-batch baking so appealing — this small-batch cookies without baking soda is another example of a dessert that does not demand much from the cook, and the SavorFoodies desserts and baking collection leans on the same idea: sweet things that fit into a normal day, not just a special occasion.
Ingredients You Need
You need a 20 cm square tin for this recipe, lined with baking paper that overhangs the edges so you can lift the whole slab out for slicing. A loaf tin works too, though the bars will be thicker and you will get fewer of them. Either way, the lining matters — without it, you will be digging bars out of the tin with a spoon, which tastes fine but looks less impressive.
For the three layers, gather:
- 200 g digestive biscuits or graham crackers, crushed into fine crumbs
- 100 g unsalted butter, melted, plus 2 tablespoons for the topping
- 200 g smooth peanut butter (not the natural, oil-separated kind)
- 150 g icing sugar, sifted
- 1 teaspoon vanilla extract
- 1/2 teaspoon fine sea salt, plus a pinch for the top
- 200 g dark or milk chocolate, chopped (or a mix of both)
- Flaky sea salt, for sprinkling (optional, but wonderful)
A note on the peanut butter, because it matters here: use a standard smooth peanut butter, the kind that stays mixed in the jar, not a natural one where the oil separates. Natural peanut butter makes a filling that is greasy and does not set properly, because the oil content is unpredictable. The regular kind gives you a filling that is firm, sliceable, and creamy. Peanut butter has a longer history than most people realise, and the smooth, emulsified version is a relatively modern invention — but for baking, it is the right tool for the job.
For the chocolate, dark chocolate gives a more grown-up, less sweet bar, while milk chocolate makes something closer to a peanut butter cup. A mix of half dark and half milk is my usual choice, because it balances sweetness and depth. Chocolate quality matters more than brand here — use something you would happily eat on its own, because the top layer is the first thing you taste, and cheap chocolate tastes cheap no matter what is underneath it.
How to Make It
- Prepare the tin. Line a 20 cm square tin with baking paper, leaving an overhang on two sides so you can lift the slab out later. This step takes a minute and saves a lot of frustration at slicing time. Set the tin aside.
- Make the base. Crush the biscuits into fine crumbs — a food processor does this in seconds, or put them in a zip-top bag and crush them with a rolling pin, which is satisfying and works just as well. Tip the crumbs into a bowl, pour over the melted butter, and mix until the crumbs are evenly damp and hold together when squeezed. Tip into the prepared tin and press down firmly and evenly, using the bottom of a glass or a measuring cup to get a flat, compact layer. Put the tin in the fridge while you make the filling.
- Make the peanut butter filling. In a large bowl, beat together the peanut butter, soft butter (not melted — soft, at room temperature), icing sugar, vanilla, and salt until smooth and creamy. This takes a couple of minutes by hand with a wooden spoon, or about a minute with an electric mixer. The mixture should be thick but spreadable, like soft frosting. If it seems too stiff, add a tablespoon of milk. If it seems too soft, add a tablespoon more icing sugar.
- Spread the filling. Take the tin out of the fridge and spread the peanut butter filling evenly over the base, smoothing the top with a spatula or the back of a spoon. Try to get it as level as you can, because an uneven filling means uneven bars. Return the tin to the fridge for fifteen minutes while you melt the chocolate.
- Make the chocolate topping. Put the chopped chocolate and the remaining two tablespoons of butter in a heatproof bowl over a pan of barely simmering water, making sure the bowl does not touch the water. Stir occasionally until melted and smooth, then take it off the heat and let it cool for five minutes. It should be warm and fluid, not hot — hot chocolate poured over cold filling can melt the filling and make the layers bleed into each other.
- Top and chill. Pour the cooled chocolate over the peanut butter layer and tilt the tin gently so it spreads to the edges. Smooth the top with a spatula, sprinkle with flaky sea salt if you are using it, and return the tin to the fridge. Chill for at least one hour, or until the chocolate is completely firm. Two hours is even better if you have the time.
- Slice and serve. Lift the slab out of the tin using the paper overhang and place it on a cutting board. Use a large, sharp knife, warmed under hot water and wiped dry between cuts, to slice into sixteen squares. The warm knife is the secret to clean cuts through the chocolate without cracking it. Serve cold or at cool room temperature.
Tips for the Best Result
The most common mistake with these bars is impatience at the slicing stage. If you cut them while the chocolate is still soft, the layers smear and the squares look messy. If you cut them straight from a very cold fridge with a cold knife, the chocolate cracks. The sweet spot is a fully set slab, about ten minutes out of the fridge, and a knife warmed under hot water. Wipe the knife between cuts and the squares come out clean and sharp-edged, like they came from a shop.
The second tip is about pressing the base. It needs to be firm and even, or the bars fall apart when you pick them up. Use the bottom of a glass to press it down, and pay attention to the corners and edges, which are the first places to crumble. If the base seems too dry and will not hold together, add another tablespoon of melted butter and mix again. If it seems greasy, you have added too much — but a tablespoon of extra biscuit crumbs will usually fix it.
One more thing worth knowing: the filling sets firmer in the fridge than at room temperature, so these bars are best served cool rather than warm. If you are taking them to a gathering, keep them in the fridge until the last minute, and transport them in the tin with the paper still in place. They will hold their shape for a couple of hours at cool room temperature, but on a hot day they soften faster, so plan accordingly.
What to Serve With It
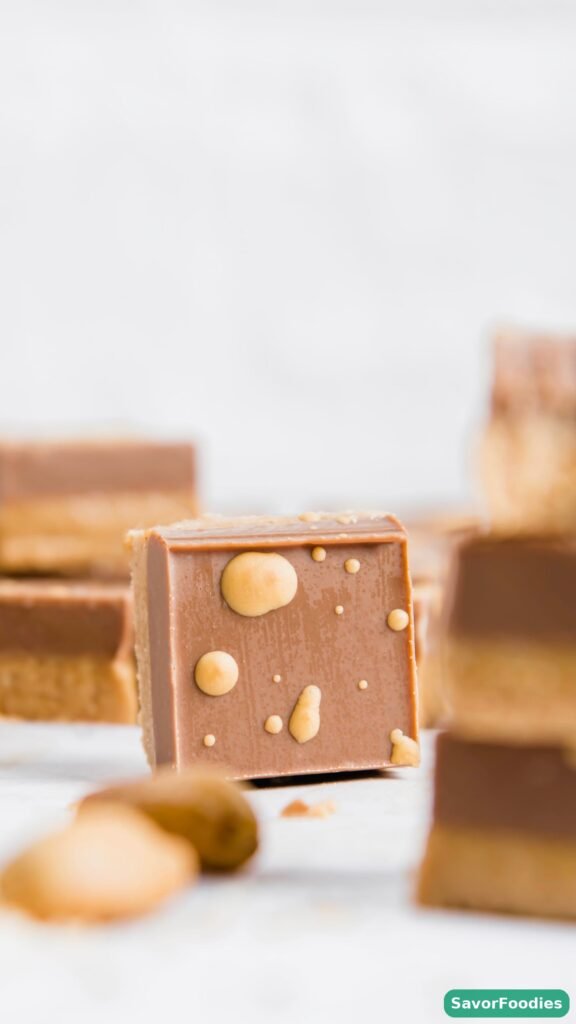
These bars are rich, so a little goes a long way, and they pair best with something simple. A cup of coffee is the classic partner — the bitterness balances the sweetness beautifully. A glass of cold milk is the nostalgic choice, and it works just as well for adults as it does for children. For a dessert plate, a few fresh berries alongside add colour and a sharp contrast that keeps the whole thing from feeling too heavy.
If you are building a dessert table, these bars sit happily next to other small-batch baking. This small-batch chocolate chip cookies without brown sugar is another dessert that does not demand a whole afternoon, and the SavorFoodies homepage has more sweet ideas in the same low-effort spirit. For a party, cut the bars smaller — thirty-two little squares instead of sixteen — and they become perfect finger food that people can eat standing up without a plate.
Storage and Reheating
These bars keep beautifully, which is one of their best features. Store them in an airtight container in the fridge for up to two weeks, with a sheet of baking paper between layers so they do not stick together. They actually taste better on the second day, once the flavours have settled and the base has firmed up fully. For the freezer, they are excellent: freeze the sliced squares in a single layer on a tray, then bag them, and they keep for up to three months. Thaw in the fridge for an hour before serving, or eat them straight from the freezer if you like a firmer, almost fudge-like texture.
There is no reheating here, obviously, but there is a serving temperature to think about. Straight from the fridge, the chocolate snaps and the filling is firm. After ten minutes at room temperature, the filling softens to a creamier texture and the chocolate is less brittle. Both are good — it is a matter of preference, and worth trying both ways to see which you like better. I tend to serve them cool rather than cold, because the peanut flavour comes through more clearly.
Frequently Asked Questions
Can I use crunchy peanut butter?
Yes, and it adds a nice texture. The bars will be a little less smooth and a little more rustic, but the flavour is the same and some people prefer the crunch. Use the same quantity, and make sure it is a standard emulsified crunchy peanut butter rather than a natural one, for the same setting reasons as smooth. If you use crunchy, you may want to reduce the flaky salt on top slightly, since the peanuts themselves add saltiness.
Why did my chocolate top crack when I sliced it?
Almost always, the slab was too cold or the knife was cold. Let the slab sit at room temperature for about ten minutes before slicing, and warm the knife under hot water, wiping it dry between cuts. A little butter in the chocolate also helps — it keeps the top slightly softer and less brittle. If cracking still happens, do not worry too much: cracked bars taste exactly the same, and a dusting of cocoa powder over the top hides a multitude of sins.
Can I make these dairy-free?
Mostly, yes. Use a dairy-free butter alternative for the base and the filling, and a dairy-free dark chocolate for the top. Check that your biscuits are dairy-free too — many digestives contain milk, though there are dairy-free versions available. The texture will be very similar, though the filling may be slightly softer, so give it an extra half hour in the fridge before slicing.
How do I stop the layers from separating?
Layers separate when the filling is too soft or the chocolate is poured on too hot. Make sure the filling is firm from its fifteen minutes in the fridge before you add the chocolate, and let the melted chocolate cool for five minutes before pouring. Pressing the filling down firmly also helps it grip the base. If a layer does lift when slicing, press it back gently — it will re-stick in the fridge.
Can I add anything to the filling?
Yes, and this is a fun recipe to play with. A handful of crushed pretzels stirred into the base adds salt and crunch. A layer of sliced banana between the filling and the chocolate is surprisingly good, though it shortens the fridge life to about three days. A teaspoon of instant coffee dissolved in the melted chocolate deepens the flavour without tasting like coffee. Keep additions modest, though — the classic version is classic for a reason.
What size tin should I use?
A 20 cm square tin gives bars that are a good thickness — not too thin, not too chunky. A loaf tin works and gives thicker bars, but you will get fewer of them and the chocolate layer will be a little thicker relative to the filling. A larger tin, like 23 cm square, gives thinner bars that set faster but are more fragile. Whatever tin you use, line it with overhanging paper, because lifting the slab out is the only sane way to slice it.
That is all there is to it, and I mean that — twenty minutes of active time, an hour in the fridge, and a tin of bars that will make you look like you tried much harder than you did. Keep the recipe somewhere handy, because once people taste these, they will ask for them again, and you will be glad you can make them without turning the oven on. Summer, winter, party, or quiet night in — there is rarely a wrong moment for chocolate and peanut butter.