

There are some dinners that feel like a small celebration without asking you to spend the whole evening in the kitchen, and baked chicken parmesan is one of them. The chicken comes out of the oven with a crisp, golden crust, the marinara bubbles up around the edges, and the mozzarella melts into that stretchy, slightly browned blanket that makes everyone reach for a second helping before they have finished the first. It looks like something from a red-checkered-tablecloth restaurant, and it tastes like it too, but the whole thing is honestly a weeknight dinner in disguise.
I used to think chicken parmesan was a weekend-only project, the kind of dish that involved frying pan after frying pan and a stovetop covered in oil splatter. Then a friend showed me her baked version, and I never went back. Baking the breaded chicken on a hot sheet pan gives you nearly all of the crunch with a fraction of the mess, and finishing it in the sauce means the cheese melts right onto the chicken instead of sliding off into the pan. The oven does the heavy lifting while you set the table and boil the pasta, which is exactly how a busy-night dinner should work.
If you have never breaded chicken before, this is a kind one to learn on. The steps are simple and forgiving, the ingredients are things you probably already have, and the result is hard to mess up badly. Even if your first coating is a little uneven, the sauce and cheese cover a multitude of sins. By the second time you make it, you will have your own rhythm down, and it will probably join the regular rotation. In our house it did, and it has not left since.
Why This Recipe Works
The secret to good baked chicken parmesan is treating the breading like it matters, because it does. A lot of baked versions go soggy because the chicken is coated and then drowned in sauce too early. Here, the chicken gets a proper bake first, on its own, until the crust is genuinely crisp. Only then does it meet the sauce, and only for long enough for the cheese to melt. That order is everything. The crust stays intact underneath, the sauce stays on top where it belongs, and every bite has both crunch and softness instead of turning into one uniform mush.
The second reason it works is the cheese combination. Mozzarella on its own melts beautifully but can be a little bland, while Parmesan on its own is salty and sharp but does not melt into that pull-apart layer everyone wants. Together, they cover each other. The mozzarella gives you the stretch, the Parmesan gives you the flavour, and a little of each in the breading itself means the crust is seasoned all the way through, not just on the surface. If you want to know more about the dish’s background, the story of chicken parmigiana is a good read, though you do not need history to cook it well.
There is also the practical side. This is a dinner that scales without drama. Two chicken breasts feed two people, four feed a family, and doubling the recipe just means a second sheet pan. Leftovers reheat better than most fried food, because the crust was baked rather than deep-fried in the first place. You will find the same weeknight-friendly thinking across the SavorFoodies chicken recipes, and on the SavorFoodies homepage you will see that same approach — food meant for real Tuesdays, not just special occasions.
Ingredients You Need
For the chicken, you want boneless, skinless breasts, and the single most important prep step is getting them to an even thickness. A thick breast cooks unevenly — dry at the thin end, raw in the middle — and no amount of sauce fixes that. Pounding them to about a centimetre thick takes two minutes and changes everything. If you would rather skip the mallet, buy thin-sliced cutlets, or slice thick breasts horizontally into two thinner pieces yourself. Thighs work too, though they need a couple of extra minutes in the oven.
For the rest, gather:
- 4 boneless, skinless chicken breasts (about 700 g), pounded to even thickness
- 1 teaspoon kosher salt, plus more to taste
- 1/2 teaspoon black pepper
- 1 cup plain breadcrumbs, preferably panko for extra crunch
- 1/2 cup freshly grated Parmesan cheese, plus 2 tablespoons extra for topping
- 1 teaspoon dried Italian seasoning
- 1/2 teaspoon garlic powder
- 2 large eggs
- 2 tablespoons milk or water
- 3 tablespoons olive oil, for the sheet pan and drizzling
- 2 cups marinara sauce, homemade or a good jarred one
- 1 1/2 cups shredded low-moisture mozzarella
- A small handful of fresh basil leaves, torn, for serving
- Red pepper flakes, optional
A note on the breadcrumbs, because they make or break the crust. Panko gives a lighter, crunchier coating than fine breadcrumbs, and it holds up better under sauce. If all you have is regular breadcrumbs, they will still work — just toast them lightly in a dry pan first for a few minutes, which helps them stay crisp. And on the cheese: Parmesan is worth grating fresh here. The pre-grated kind contains anti-caking agents that keep it from melting as smoothly, and in a dish where cheese is half the point, that matters.
As for the marinara, use one you actually like eating on its own, because there is nowhere for a mediocre sauce to hide. A simple jarred marinara is completely fine, and honestly better than a rushed homemade one. If you do make your own, keep it fairly thick — a watery sauce is the fastest way to a soggy crust, and nobody wants that after all the breading work.
How to Make It
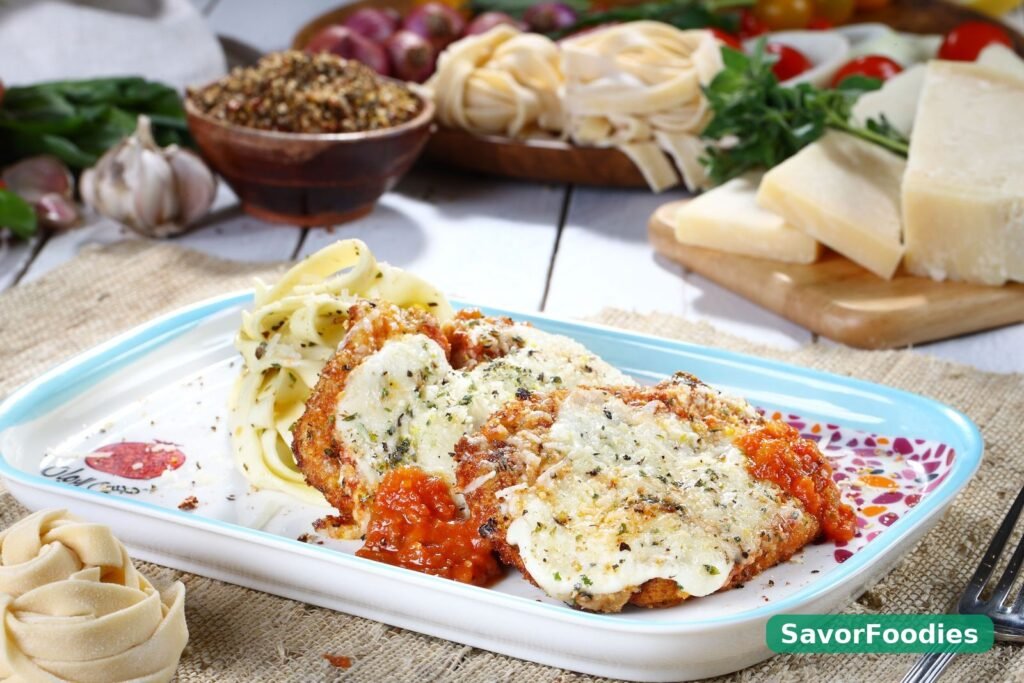
- Prepare the chicken. Heat the oven to 220°C (425°F) and line a large rimmed sheet pan with parchment paper. Brush the paper lightly with olive oil. If your chicken breasts are thick, place each one between two sheets of cling film and pound gently with a meat mallet or rolling pin until it is about 1 cm thick all over. Season both sides with salt and pepper. This is also a good moment to think about portions — if you are cooking for two rather than four, you will find a similar scaled-down approach in this easy chicken dinner for two with simple ingredients, which is worth a look when you do not want a fridge full of leftovers.
- Set up the breading station. You need two shallow dishes. In the first, whisk the eggs with the milk until smooth. In the second, mix the breadcrumbs, Parmesan, Italian seasoning, and garlic powder with a fork until evenly combined. Keep a clean plate nearby for the coated chicken. The order matters: wet first, then dry, and keep one hand for wet and one hand for dry if you can manage it. It sounds fussy, but it keeps the breading on the chicken instead of on your fingers, and the coating comes out much more even.
- Bread the chicken. Working one piece at a time, dip a breast into the egg mixture, letting the excess drip off for a few seconds, then press it firmly into the breadcrumb mixture, turning once and pressing so the crumbs stick all over. Shake off the loose crumbs and lay the piece on the prepared sheet pan. Repeat with the rest. Once they are all coated, drizzle or spray the tops lightly with olive oil. This is what helps the crust turn golden in the oven instead of staying pale and dry, so do not skip it.
- Bake until crisp. Slide the pan into the hot oven and bake for 15 to 18 minutes, flipping the chicken once halfway through, until the coating is deep golden and the thickest part of the chicken reads 74°C (165°F) on an instant-read thermometer. If you do not have a thermometer, cut into the thickest piece — the juices should run clear and there should be no pink left. The chicken should look properly crisp at this point, not just cooked. If it needs another minute or two, give it that; a pale crust now means a soft crust later.
- Add sauce and cheese. Take the pan out of the oven and spoon marinara over each piece — about a third of a cup per breast, spread mostly over the top rather than pooling around the sides. Sprinkle generously with mozzarella, then a little extra Parmesan. Return the pan to the oven for 5 to 7 minutes, just until the cheese is melted, bubbling, and starting to brown in spots. This is a short finish, and that is deliberate. Any longer and the sauce starts soaking through the crust.
- Rest and garnish. Let the chicken rest on the pan for five minutes before serving. This lets the cheese settle so it does not slide straight off when you lift a piece, and it lets the crust firm up again after its time under the sauce. Scatter torn basil over the top and a pinch of red pepper flakes if you like heat. Serve straight from the pan if you are feeling casual, or transfer each piece carefully with a wide spatula.
Tips for the Best Result
The most common mistake with baked chicken parmesan is crowding the pan. If the pieces touch, steam gets trapped between them and the sides never crisp. Use a big sheet pan, or two pans if you have to, and give each piece at least a couple of centimetres of breathing room. It is a small thing that makes a visible difference, and it is the same reason restaurant kitchens use sheet pans the size of small tables.
Another tip: do not sauce the chicken ahead of time. It is tempting to assemble everything in a baking dish and slide it into the oven as one unit, but that is how you get a soft top. The two-stage bake — crisp first, sauce second — is the whole method, and it is worth the extra five minutes of handling. If you are making this for guests, you can bread the chicken hours ahead and keep it uncovered in the fridge, which actually dries the coating slightly and helps it crisp even better.
A few more things I have learned the hard way. Low-moisture mozzarella is the right choice here, not fresh mozzarella, which releases too much water and makes the top soggy. If the sauce you are using is very thin, simmer it for ten minutes first to thicken it. And if your oven runs cool, check the crust at 15 minutes rather than trusting the timer — every oven is a little different, and yours is the one you are cooking in. If you are cooking without an oven at all, the stovetop world has its own answers, like this guide to chicken breast recipes without oven or air fryer, though for this particular dish the oven is really where it shines.
What to Serve With It
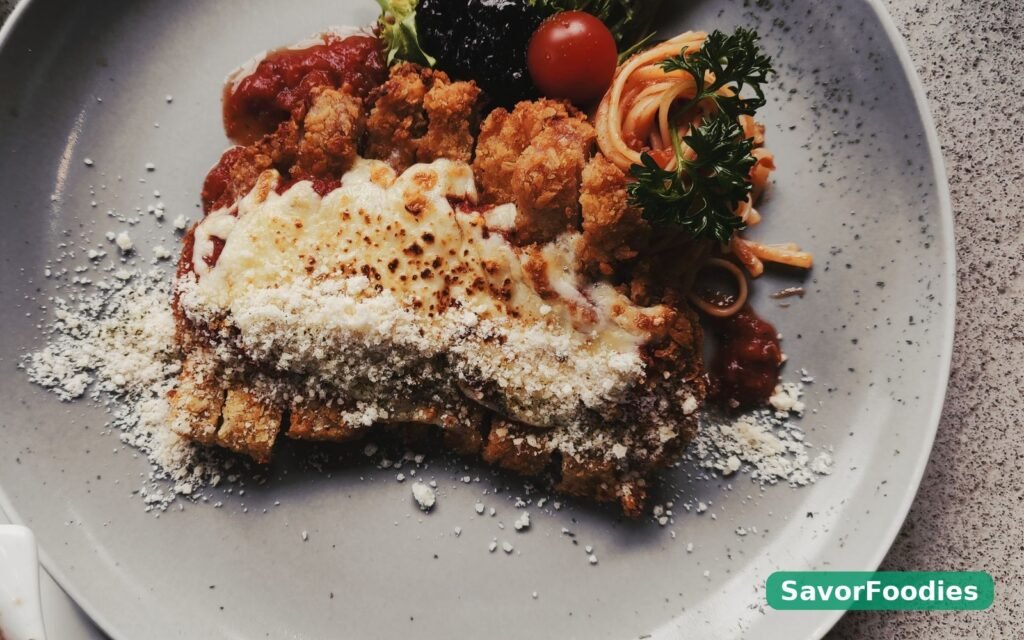
Spaghetti is the classic partner, and for good reason. A tangle of pasta tossed with the extra marinara catches the sauce that runs off the chicken, and the whole plate feels complete without any extra effort. Cook the pasta while the chicken is in its first bake, toss it with warm sauce and a little of the pasta water, and keep it waiting in the pot with the lid on. Garlic bread is the other obvious choice, and honestly, if you are already heating the oven, sliding in a loaf for the last ten minutes costs nothing.
For vegetables, something green and simple keeps the plate balanced. A crisp salad with lemon and olive oil cuts through the richness, and steamed green beans or roasted broccoli add colour without competing. If you want the meal to feel a little lighter, serve a smaller piece of chicken with a bigger salad and a slice of bread for the sauce — nobody will feel short-changed, because the chicken is rich enough to carry a modest portion.
If you are building the whole meal around this dish for guests, a simple starter helps the timing. A plate of olives and bread while the chicken bakes, a green salad alongside, and maybe a lemon dessert afterwards — the meal feels generous without you spending the evening at the stove. The chicken itself is the star, and everything around it should be easy enough to make while it is in the oven.
Storage and Reheating
Leftovers keep well in the fridge for up to three days, stored in an airtight container. The crust will soften in the fridge — that is unavoidable — but the flavour holds up beautifully, and a proper reheat brings back most of the texture. For the freezer, this dish is decent: freeze the baked, unsauced chicken separately from the sauce if you can, and it will keep for up to a month. Assembled leftovers freeze too, but the crust suffers more.
Reheating is where most people undo a good crust, so go back to the oven. Warm the chicken on a sheet pan at 200°C (400°F) for 10 to 12 minutes, until it is hot through and the top crisps up again. The microwave works in a pinch, but it will leave you with a soft coating, and for a dish built on crunch, that is a real loss. If the chicken looks dry after reheating, a spoonful of warm marinara on top fixes it instantly.
Frequently Asked Questions
Can I use chicken thighs instead of breasts?
Yes, and they are actually more forgiving. Boneless, skinless thighs stay juicy even if you overshoot the cooking time by a few minutes, which makes them a good choice if your oven runs hot or you get distracted. Pound them to even thickness just like breasts, and give them an extra three to five minutes in the first bake. Bone-in thighs work too, but they need longer — closer to 25 minutes — and a thermometer is your friend there.
How do I keep the crust from going soggy?
Two things matter most: bake the chicken until genuinely crisp before any sauce touches it, and keep the sauce on top rather than pooling around the sides. Use a thick marinara, low-moisture mozzarella, and a short finish in the oven — five to seven minutes, no more. If your sauce is thin, simmer it down first. And never cover the dish with foil while the cheese melts, because trapped steam is the enemy of crunch.
Can I make this ahead of time?
You can bread the chicken up to a day ahead and keep it uncovered in the fridge, which actually helps the coating dry out slightly and crisp better. You can also bake the chicken fully, cool it, and refrigerate it, then sauce and cheese it just before serving and finish it in a hot oven. What I would not do is assemble the whole sauced dish ahead of time — the crust will soak through while it waits, and there is no way back from that.
What if I do not have panko breadcrumbs?
Regular fine breadcrumbs work fine, though the crust will be a little less craggy. Toast them lightly in a dry pan for a few minutes first, stirring often, until they smell nutty — that helps them stay crisp under the sauce. Crushed cornflakes or cracker crumbs are also workable substitutes in a pinch, though they change the flavour slightly. Whatever you use, season the crumbs well, because unseasoned breading is the most common reason this dish tastes flat.
Is this recipe gluten-free?
Not as written, because of the breadcrumbs, but it adapts easily. Swap in gluten-free breadcrumbs or crushed gluten-free crackers, and check that your marinara is gluten-free. The rest of the recipe — chicken, eggs, cheese, sauce — is naturally fine. The coating will be slightly less crisp with some gluten-free crumbs, so give the chicken an extra minute or two in the first bake.
Can I add extra toppings?
Absolutely. A few slices of pepperoni tucked under the cheese, a spoonful of pesto swirled into the marinara, or a handful of sliced mushrooms cooked first and scattered on top all work well. Just keep additions light — a heavy layer of wet toppings will weigh the crust down and undo the crispness you worked for. One extra element is plenty; this dish does not need a crowd.
This is the kind of dinner that makes a normal evening feel a little bit special without demanding a special effort. One sheet pan, a sauce you actually like, cheese that melts into everything, and a crust that stays crisp where it matters. Make it once exactly as written, then make it yours — a little more garlic in the crumbs, a spicier marinara, mushrooms if you love them, or a different side depending on what is in the cupboard. That is how a recipe earns a permanent place in a home kitchen: not by being perfect the first time, but by being good enough that you want to cook it again next week, and the week after that.