

There is a particular kind of silence that falls over a dinner table when a side dish turns out better than the main course. Nobody planned it. The chicken was supposed to be the star, the rice was supposed to do its quiet supporting job, and then someone reaches for a third helping of green beans and asks, slightly embarrassed, if there are any left in the pan. That is exactly what happens with these roasted garlic parmesan green beans, and it has happened in my kitchen often enough that I now make a double batch whenever guests are coming, just to be safe.
The first time I made them, I was not trying to be clever. I had a pound of green beans sitting in the crisper drawer, a head of garlic that was starting to sprout, and a wedge of Parmesan that had been wrapped and rewrapped so many times it looked like a small archaeological find. Dinner was in forty minutes, the oven was already going to be on for chicken thighs, and I did not want another pot to wash. So I tossed everything onto a sheet pan, slid it into a hot oven, and hoped for the best. Twenty minutes later the kitchen smelled like a restaurant kitchen on a good night — garlicky, nutty, a little toasty around the edges — and the beans came out blistered in spots, tender in the middle, and salty-crisp where the cheese had melted and caught on the pan. I have barely changed the recipe since, because some things do not need improving, only repeating.
What makes this dish so dependable is that it asks very little of you and gives back a lot. There is no blanching, no ice bath, no fussy technique. You trim the beans, toss them with oil and seasoning, roast them hot and fast, and shower them with cheese at just the right moment so it melts without burning. The whole thing takes about thirty minutes from the time you open the fridge to the time you carry the pan to the table, and most of that is oven time you can spend doing something else. If you have ever stood over a skillet of steamed beans wondering why they taste so flat, this is your way out. Roasting changes everything: the natural sugars in the beans caramelize, the garlic turns sweet and golden instead of sharp, and the Parmesan forms those irresistible crispy little bits that everyone picks off the pan first.
Why This Recipe Works
Roasting at high heat is the single decision that makes this recipe work, and it works for a simple reason. Green beans are mostly water, and gentle cooking methods like steaming or boiling trap that water around them, which is why steamed beans can taste washed-out and go limp on the plate. A hot oven does the opposite. At 425 degrees Fahrenheit, the surface moisture evaporates quickly, the beans start to blister and wrinkle in places, and their flavor concentrates instead of diluting. You get beans that are still snappy in the center but have real character on the outside — a little char here, a golden edge there, and none of that grey-green sadness that comes from overcooking in a pot.
The garlic timing matters just as much. Garlic burns fast, and burnt garlic is bitter enough to ruin a whole pan. That is why this recipe does not throw raw minced garlic into the oven for the full roasting time. Instead, the beans go in first with oil, salt, and pepper, and the garlic joins them partway through, when there is still enough time for it to soften and sweeten but not so much time that it scorches. Sliced garlic works beautifully here because the thin pieces crisp at the edges like little chips, while minced garlic can disappear into the oil and overcook before you notice. Either way, the goal is the same: garlic that smells warm and toasty when you open the oven door, not acrid.
Then there is the Parmesan, which does two jobs at once. Some of it melts directly onto the hot beans and turns into a savory, salty coating, and some of it lands on the pan itself, where it crisps into lacy, golden shards. Those shards are the best part, and I am not exaggerating when I say people fight over them. The trick is adding the cheese in the last few minutes of cooking rather than at the start. Parmesan added too early dries out and can turn bitter; added late, it stays nutty and rich. A final squeeze of lemon at the end is optional, but I rarely skip it — it wakes the whole pan up and keeps the richness from feeling heavy. If you are building a collection of reliable vegetable dishes, this one belongs alongside our other sides and vegetables, because it is the kind of recipe you will reach for on busy weeknights and holidays alike.
Ingredients You Need
You do not need a long shopping list for this recipe, and that is part of its charm. Every ingredient earns its place, and there is nothing here you cannot find at an ordinary grocery store. Fresh beans are worth seeking out, though — this is one recipe where the main ingredient really carries the dish, so starting with good beans makes a noticeable difference.
- 1 1/2 pounds fresh green beans, trimmed
- 3 tablespoons olive oil
- 4 cloves garlic, thinly sliced
- 3/4 teaspoon kosher salt, plus more to taste
- 1/2 teaspoon freshly ground black pepper
- 1/2 teaspoon garlic powder (optional, but it deepens the garlic flavor)
- 3/4 cup freshly grated Parmesan cheese
- 1/4 teaspoon red pepper flakes (optional, for a gentle warmth)
- 1 teaspoon lemon zest and 1 tablespoon fresh lemon juice, to finish
- 1 tablespoon chopped fresh parsley, for serving
A few notes on choosing ingredients will save you trouble later. Look for beans that are firm and snap cleanly when you bend them; if they bend without breaking or feel rubbery, they are past their best and will roast up limp no matter what you do. Thinner beans, the kind often labeled haricots verts, cook a little faster and get crisper, while thicker standard green beans stay meatier — both work, just watch the thicker ones for an extra minute or two. For the cheese, freshly grated Parmesan melts and crisps far better than the pre-grated kind from a shaker, which often contains anti-caking agents that keep it from melting smoothly. If you only have pre-grated Parmesan, it will still taste good, but the texture will not be quite as good. And use a decent olive oil, since you will actually taste it here; it does not need to be your most expensive bottle, just one you enjoy.
How to Make It
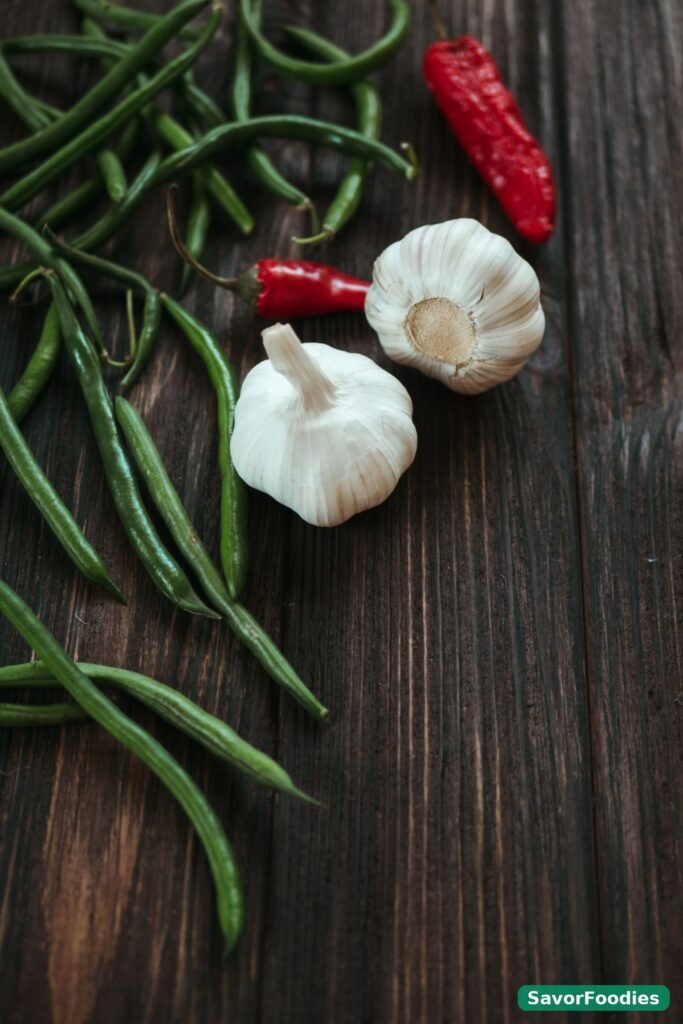
Start by heating your oven to 425 degrees Fahrenheit and putting a large rimmed baking sheet inside while it preheats. A hot pan is a small step that makes a real difference — when the beans hit hot metal, they start roasting immediately instead of slowly warming up and steaming. If your baking sheet is crowded into the oven cold, the beans will release their moisture before the pan gets hot enough, and you will end up with softer beans. While the oven heats, wash the beans and dry them thoroughly. This is the step most people rush, and it is the one that matters most for crispness. Spread the beans on a clean kitchen towel or a few layers of paper towels and pat them until they are as dry as you can get them. Water is the enemy of crisp roasting, and even a little surface moisture will hold the beans back.
- Trim the beans by snapping or cutting off the stem ends. You do not need to trim the curly tail ends unless they look dried out, and you do not need to cut the beans into pieces — whole beans roast beautifully and look better on the plate.
- Put the dry beans in a large bowl and drizzle over the olive oil. Toss with your hands until every bean has a light, even sheen. If the beans look dry in spots, add another teaspoon of oil; if they look greasy, you have added too much, and the excess will pool on the pan.
- Sprinkle over the kosher salt, black pepper, and garlic powder if you are using it. Toss again so the seasoning is distributed, and taste a raw bean for salt if you like — it should taste seasoned but not salty, since the Parmesan will add more salt later.
- Take the hot baking sheet out of the oven — use oven mitts, it will be properly hot — and spread the beans on it in a single layer. This is non-negotiable. Beans piled on top of each other steam; beans in a single layer roast. Leave a little breathing room between them, and if your pan is small, use two pans rather than crowding one.
- Roast for 12 minutes, then pull the pan out and flip the beans with tongs. You should already see some blistering and light browning on the undersides. Scatter the sliced garlic over the beans now, tucking most of it between the beans rather than leaving it all on top where it can burn.
- Return the pan to the oven and roast for another 6 to 8 minutes, until the beans are tender when pierced with a fork but still have a slight bite, and the garlic is golden at the edges. The beans should look wrinkled in places and deeply green, with browned spots here and there.
- Sprinkle the grated Parmesan evenly over the hot beans, along with the red pepper flakes if you are using them. Return the pan to the oven for just 2 to 3 minutes, until the cheese is melted and starting to turn golden in spots. Watch it closely at this stage — it goes from perfect to overdone quickly.
- Remove the pan from the oven and immediately toss the beans gently with the lemon zest and lemon juice. The heat will bloom the zest and make the whole pan smell wonderful. Taste and adjust the salt, shower with parsley, and serve straight from the pan or transfer to a warm serving dish, scraping up all the crispy cheese bits from the pan. Those bits are not to be left behind.
The whole active time is about ten minutes, and the rest is the oven doing the work. If your beans are very thin, start checking at the 18-minute mark; if they are thick, they may need the full time or a minute more. The beans are done when a fork goes in with just a little resistance and the outside looks blistered, not when they have gone soft and olive-colored. Err on the side of pulling them a touch early, because they keep cooking for a minute or two on the hot pan after they come out.
Tips for Crispy, Not Soggy Beans
Almost every soggy green bean problem comes down to one of four things: wet beans, a crowded pan, an oven that is not hot enough, or beans left sitting too long after cooking. Fix those four things and the recipe nearly takes care of itself. Dry the beans properly, give them room, make sure the oven is fully preheated to 425 degrees before the pan goes in, and serve the beans within a few minutes of finishing. Beans that sit on a cooling pan for twenty minutes will soften as the steam trapped underneath them reabsorbs, so timing the rest of dinner around the beans, rather than the other way around, is the smart move.
The pan you choose matters more than you might think. A heavy, light-colored rimmed baking sheet gives the most even browning, while a dark nonstick pan can brown the cheese too fast on the bottom before the beans are done. Parchment paper is convenient for cleanup, but it also insulates the beans slightly from the hot metal, so if crispness is your priority, roast directly on a lightly oiled pan. If you do use parchment, it still works well — just expect a minute or two more in the oven. And resist the urge to cover the pan with foil at any point. Covering traps steam, which is exactly what you are trying to avoid.
A couple of other small habits make a difference. First, do not salt the beans and then let them sit for half an hour before roasting; salt draws moisture out of vegetables over time, and that moisture works against you in the oven. Season right before they go in. Second, if your oven runs cool — and many home ovens do — an oven thermometer is a worthwhile few dollars, because roasting at an actual 400 degrees when you set 425 will give you noticeably softer beans. Third, if you want extra crunch, you can toss the finished beans with a spoonful of toasted breadcrumbs or chopped toasted almonds, though purists may argue the Parmesan crisp is crunch enough on its own. And if you love golden, crispy potatoes as much as I do, our crispy potatoes in the air fryer without oil uses the same high-heat, single-layer principle to get that crunch without a deep fryer.
What to Serve With It
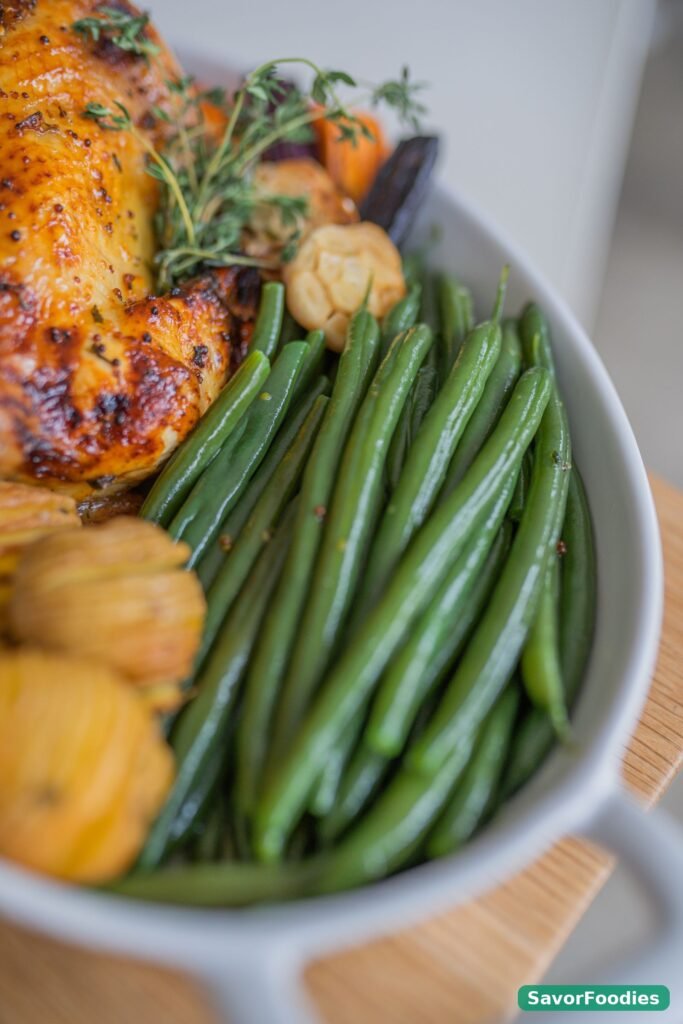
These beans are the rare side dish that genuinely goes with almost everything, which is why they show up at my table so often. They are natural with roast chicken, where the garlicky pan juices and the crisp beans play off each other beautifully, and they are just as good next to a simple pan-seared steak or pork chops, where something green and bright cuts through the richness of the meat. With fish, especially salmon or roasted cod, the lemon finish on the beans ties the whole plate together without any extra sauce. I have also served them at Thanksgiving alongside turkey and mashed potatoes, and they were the first bowl to empty — partly because people were tired of heavy dishes, and partly because a crisp, salty green vegetable is a welcome break on a plate full of soft, rich food.
For weeknight dinners, think about what is already on your stove. If you are making pasta with a simple tomato or butter sauce, a pile of these beans on the side turns it into a complete meal without much extra effort. They are excellent with rice dishes too, particularly a lemony rice pilaf or a simple buttered rice, and they hold their own next to grain bowls and roasted sweet potatoes. If you want a fuller spread, pair them with another roasted vegetable or a starchy side: our crispy potatoes without breadcrumbs make a wonderful partner, because the golden potatoes and the blistered beans share the same oven temperature and can even go in together if you have room. Add a simple green salad or some crusty bread to mop up the garlicky oil, and dinner is done.
They also work surprisingly well cold or at room temperature, which makes them useful beyond dinner. Leftover beans chopped into a grain salad, tucked into a lunchbox with some chicken and rice, or piled onto toast with a smear of ricotta for a quick lunch are all genuinely good, not just ways to use things up. For a party, you can double the recipe across two pans and serve the beans at room temperature on a big platter — they hold up for an hour or so without going sad, as long as they were properly crisp to begin with. Just keep the lemon and parsley garnish until the last minute so the colors stay bright.
Storage and Reheating
Stored properly, these beans keep in the refrigerator for three to four days in an airtight container. Let them cool completely before you put the lid on, because sealing warm beans traps steam and softens the crisp edges you worked for. They will not stay as crisp as they were fresh from the oven — that is simply the nature of roasted vegetables — but they will still taste very good, and reheating them the right way brings back a surprising amount of their texture.
The best way to reheat them is back in the oven. Spread the beans in a single layer on a baking sheet, heat the oven to 400 degrees, and warm them for 5 to 7 minutes until they are heated through and the edges start to crisp again. A quick sprinkle of fresh Parmesan in the last minute helps, too, since it refreshes the cheesy top. The air fryer also works well for small portions: three to four minutes at 375 degrees, shaking the basket once, will revive them nicely. What you should avoid is the microwave for reheating if you can help it. It will get the beans hot, but it will also make them soft and a little rubbery, and it will undo the crisp cheese entirely. If the microwave is your only option, use short bursts at medium power and spread the beans on a plate rather than piling them in a bowl.
Freezing is possible but not something I recommend for this particular dish, because the texture changes more than most people enjoy. The beans go soft on thawing, and the Parmesan loses its crispness completely. If you do freeze them, skip the cheese before freezing, thaw overnight in the fridge, and roast briefly with fresh Parmesan to finish. It is workable, but honestly, the recipe is so quick that making a fresh batch is usually the better plan. One practical note: if you know you will have leftovers, hold back the lemon juice on the portion you plan to store, and add a fresh squeeze when you reheat — it brightens the beans back up in a way that reheated lemon never quite does.
Frequently Asked Questions
Can I use frozen green beans instead of fresh?
You can, but the result will be different, and it is worth knowing that going in. Frozen beans carry more water, so they need to be thawed completely and dried very thoroughly — spread them on towels and pat them dry, then let them air-dry for a few minutes if you have time. Roast them at the same temperature but expect a few extra minutes, and accept that they will be tender rather than truly crisp. They will still taste garlicky and cheesy and good, just softer. For the best texture, fresh beans are the way to go, but frozen beans are far better than skipping the dish altogether.
Why did my garlic burn?
Burnt garlic is almost always a timing or placement problem. If the garlic went in at the very start with the beans, it spent too long in a hot oven, especially if it was minced finely. Minced garlic burns much faster than sliced garlic because the small pieces dry out quickly. Next time, add the garlic halfway through roasting, use slices rather than a fine mince, and tuck the pieces between the beans so they are partly shielded from the direct heat. If your oven runs hot, you can also toss the garlic in a little extra oil before adding it, which slows the browning slightly. And if a few pieces do darken, pick them out before serving — a few bitter bits can flavor the whole pan.
Can I make this recipe ahead of time?
Yes, with a small compromise. You can trim and wash the beans up to a day ahead and store them in the fridge in a bag with a dry paper towel, which actually helps because they will be nice and dry. You can also grate the Parmesan and slice the garlic ahead. But the roasting itself is best done close to serving time, because the beans lose their crispness as they sit. If you must roast ahead, do it no more than an hour before serving, leave the beans on the pan at room temperature rather than covering them, and give them a quick blast in a hot oven for three to four minutes just before serving to wake them back up.
Is this recipe gluten-free?
Yes, as written it is naturally gluten-free. Green beans, olive oil, garlic, salt, pepper, Parmesan, lemon, and parsley contain no gluten. Just check your Parmesan label if you are cooking for someone with celiac disease, since a small number of pre-grated cheeses include anti-caking agents or are processed in facilities that handle wheat. Freshly grated Parmesan from a wedge is the safest choice, and it tastes better in this recipe anyway.
What if I do not have Parmesan?
Pecorino Romano is the closest swap and brings a saltier, sharper flavor, so use a little less salt in the recipe if you go that route. Grana Padano is another good option and behaves very much like Parmesan in the oven. In a pinch, a firm aged cheddar will melt and crisp, but it will taste quite different — richer and less nutty — so think of it as a variation rather than a substitute. What does not work well is soft cheese like mozzarella, which melts into pools instead of crisping, or the powdered Parmesan from a shaker, which tends to dry out rather than melt into those golden bits.
How do I keep the beans from getting soggy?
Dry beans, a hot oven, a single layer, and prompt serving — those four things cover nearly every case. Beyond that, avoid crowding the pan, do not cover the beans while they cook or cool, and do not add the lemon juice until the very end, since liquid added early softens the crisp edges. If your beans still come out soft, check your oven temperature with a thermometer, because an oven running 25 degrees cool will change the outcome more than any other single factor. And remember that thicker beans simply need more time; pulling them early because the clock says so, rather than because they look and feel done, is an easy mistake to make.
The best thing about this recipe, in the end, is how little it asks and how reliably it delivers. It is not a project, not a special-occasion production, and not something you need a new piece of equipment to make. It is a pound of green beans, a hot oven, garlic, and cheese, turned into the dish people remember from dinner — the one they ask about on the way home. Here at SavorFoodies, that is the kind of cooking we come back to again and again: simple food, done properly, that makes an ordinary weeknight feel a little more cared for. So preheat the oven, dry those beans well, and do not skip scraping up the crispy cheese from the pan. Your future self, standing at the counter eating the last few beans straight off the tray, will thank you.